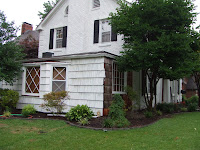
9.26.2009

Wine Country - Tour Day


I'm not normally the one who posts on here. Okay, let's be honest, I don't post ever, but I thought in honor of Joe's birthday and also the fact that he's asleep and I'm up and at 'em, I'd guest blog. (Is it really guest blogging if it's your own blog? Discuss amongst yourselves.)

Anyway, yesterday we arranged for a limo to drive us up to northern Sonoma county to visit wineries in the Dry Creek and Russian Ri
ver Valley areas. That's about as far away as one can get from Sonoma city, but we figured when paying for a DD we should take full advantage.

We started our day at Ferrari-Carano, a winery with beautiful grounds and tasty wines. It's over an hour north of Sonoma city, but we had a nice drive up there and the limo driver brought us champagne for the trip up.

We arrived at Ferrari-Carano and enjoyed a few zinfandels and some chardonnay off their tasting menu. As this was the first tastin
g of the day, we were all a little unsure of exactly what we were doing. We did okay though and apparently, it's normal to dump out the wine if you don't like
it or even if you do like it but don't want a full tasting. This was a good lesson to learn and it served us well throughout the day.

After purchasing a couple bottles of the wines we liked at Ferrari-Carano, we went on to Bella - a smaller winery nearby. (Actually, in between we got really lost up in the hills of Sonoma, but thanks to Sprint Navigation and the iPhone with Google Maps, we made it to the next winery eventually.)

Bella was amazing. Casual and beautiful grounds
with extremely friendly and knowledgeable staff who shared their love of wine with our little group. My personal favorite was their Late Harvest Zin, a dessert wine that is sweet and light but without the fortification of cognac or brandy. I had to have a bottle and I think it will be amazing with some Shatto vanilla ice cream. Joe picked out a couple other bottles and we decided it was lunch time.

Lauren had come up with the great idea of hitting up the grocery store and packing a picnic lunch. Sal, our awesome driver from Beau Tours, brought along full table service and set up our picnic on a table in the shade. We dined on bread, cheese, pesto, turkey sandwiches, and artichoke jalapeño dip and enjoyed a bottle of the Bella Rose. Delicious and very relaxing just to sit around with good friends talking and enjoying the vineyard.

After lunch were preparing to leave when we saw that they were working on making wine around the side of the building. We stood and watched and the proprietor brought over a bunch of grapes for us to try and explained the process we were observing. The CPAs of the bunch (yeah, everyone but me) were asking questions about product and inventory loss, hobbies as viewed by the IRS, and other tax related topics. It was all very interesting - for a group of accountants. The proprietor got quite a chuckle when the Christina asked about weighing bad grapes to take a loss or something like that.


Here's a picture of the wine-making process. The machinery removes the stems, but the leaves and any unacceptable grapes have to be pulled out by hand. We watched for a while and then it was time to leave for our next winery.


After Bella, we headed to J Vineyards in the Russian River Valley, an area further south of Dry Creek where we started our day. J Vineyards was a polished, modern winery without the character of Bella. It was the first place we were able to try sparkling wine though, which was something Joe and I had really been looking forward to.

When we'd finished tasting at J, there was time for only one more vineyard - Gary Farrell. Sal mentioned to us that Gary was known for his Pinot Noirs, a wine that both Joe and I really enjoy. And Sal was right - their Pinot was amazing. Apparently, there are 3 wines from Gary that are widely distributed (aka we can get it in MO) and 10+ other kinds that are only available from the winery. This was a wine we'll definitely be looking up at home and we purchased quite a few bottles to have shipped back to KC.

Overall, winery tours are really interesting and we learned that we liked the smaller, family-owned vineyards better than the big "corporate" ventures. I'm looking forward to going home and having wine show up at the house! Now we just need to finish the bar remodel and get our purchases into the new wine fridge.

Cheers!

9.23.2009

Sonoma - Night Before


It is the night before our Sonoma trip. Looking forward to going and celebrating the b-day over the trip. I have some basic items that we will be bringing. The mini computer (Holly can't live w/o it) and the GameBoy for me on the plane. I have found that the 5 year boy in me does better on plane while playing Pokemon. We are carrying our luggage on the plane since it is a short trip.

The forecast is:
Thursday: Sunny, with a high near 89. Calm wind becoming southwest between 5 and 8 mph.
Thursday Night: Clear, with a low around 53. West southwest wind between 4 and 7 mph becoming calm.
Friday: Sunny, with a high near 92. Calm wind becoming south around 5 mph.
Friday Night: Clear, with a low around 57. West southwest wind between 3 and 6 mph.
Saturday: Sunny and hot, with a high near 96.
Saturday Night: Clear, with a low around 56.
Sunday: Sunny, with a high near 91.
Sunday Night: Mostly clear, with a low around 54.

Should be a good trip. I am hoping to find some good wines and also some good times. Check back for future postings.


9.22.2009

Landscaping Part 4 - Corner Flower Bed

"Uh...hey Jose." - Luis #1
"Si?" - Joe
"Yeah, Joe, we still have a lot...a lot of wall stones. You know Jose, muchos." - Luis#1
"Usa las pierdas por the corner? Como se dice, garden bed in the front?" - Joe
"Si, Jose, we can do that." - Luis #1
"Perfecto!" - Joe

The loose exchange of me practicing Spanish (poorly) and Luis #1's tolerance of me trying led to the creation of a garden bed on our Northeast corner of the lot.

The beginning- Before I could even get a picture, Luis #2 had marked out the area and pulled out the sod. He leveled the area and began placing stones around the edge.


Luis #2 kept asking me in Spanish how I wanted the stones. I kept telling him in Spanish to have fun with it. I was just hoping for the best.


By days end on Saturday or 'fin dia a Sabado' as I would say (Luis #1 would shake is head no right now), the corner flower bed was established. I was directed to go buy some plants and pick up some soil prep and compost for planting on Sunday. The bed was edged and included two raised square spots in the front for urns or pots.


The next morning I came back with some rose, lirope, marigold, coleus, and pansy plants. Luis #1 brought his son Issac to help out. Issac was your typical high school kid who enjoyed sleeping in despite the fact that his old man was an early riser. Anyways, he did a great job helping out. This is what the bed looked life after the planting. I had two plastic pots that were put out on the raised square part in the front.


Below is the street view. The flowers were thin when they were first installed. I only had two pallets of flowers. One of marigolds and one of pansies. The pansies and marigolds were split up and planted in various spots in the garden. I spent most July mornings watering the bed. Didn't realize how much work it was going to be. I replaced the plastic terra cotta colored pots with some clay pots I bought at a place called 'Old Time Pottery'. At $15 a piece they were a steal. I also resurrected the old address number plate that was previously hidden among some ragged ewes that we replaced.


The corner bed up close. I didn't use any fertilizers/Miracle Grow. I did place a hand full of compost at the base of the roses. I have two yellow roses on the right and left and a double knock out red rose in the center. The yellow ones are your basic hybrid rose which were constantly losing leaves and subject to blackspot while the knockout had few problems. The yellow roses smelled awesome, but only bloomed a few times. They look bad, but I don't care too much otherwise I would have done some research to make them better. Next year I will get them. I am hoping with some care during next spring they will fair better. The knockout in the center basically doubled in size. Maybe it is because it retained its leaves. The marigolds came to life during August. I think by planting everything in April/May next year, I will have some solid plants during June/July instead of Late August/September. I am pleased they did so well despite being planted in late June when the temps here were in excess of 95. In all honesty, no one in the neighborhood cares about the fence or great retaining wall we put up, everyone always comments about this corner bed. It really adds a lot of color to our white house. Now I just need to add some drip irrigation so I don't have to do anything. That project will be for is next spring.

9.21.2009

Landscaping Part 3 - Plants

My favorite part of the job was picking the plants. I chose plants that I thought would be easy to care for, plants that looked interesting, and others that were suggested to me by Michael Hannan (Rock Chalk Lawn Care and CBIZ) Michael has been a great resource for bouncing of ideas. Michael works with Holly and has been able to carry over his lawn care business from college while working at the firm. Dos Luis' did the install and layout. All I had to do was buy the plants. I really had no idea how many I needed. I thought about a general area where the plants should go (front, side, patio) based on sunlight. I typically bought 2, 3, or 5 or 8 plants. I didn't even talk to Luis #1, but he put them exactly where I thought they should go.

East front side of house (mid Sept 2009) (no change since June)
We have 3 rose plants (double knockouts -red and pink); marigolds, pansies; dwarf Hinoki Cypress; boxwoods; China girl holly bush; Lirope aka lilyturf (variegated, silver, and normal); blue spruce (trimmed into a globe); some grass growing in a pot I have left at the front door which was never planted. I like the grass and have left it.


East side of house before painting (mid June 2009)
Shown from left to right is the American Holly we left; some hostas on the ground; more lirope (3 varieties); a repurposed azalea; a bush called Mellow Yellow in the middle (can't remember the type).


East side after painting (Mid Sept 2009)
This view shows the weeping evergreen (can't remember what it is exactly), the hosta to the left is huge and blooming during this time of year, on the right of the evergreen is an azalea from Mark Winiarski. He gave me a pink and white variety that I have placed in the front of the house. Also on the right, but difficult to see, is a plant called Black Lace that isn't doing well. It has this great purple/black foliage and interesting leaves. I may move it next year.


West front side of house (mid June 2009)
Left to right: Lirope, boxwood, Meteris Naturalus Gas (extremely drought tolerant and good for zones (1 -12), China Girl holly bush.


West front side of house (mid Sept. 2009)
This is an expanded view. I rescued this weeping tree (maybe a puss willow) from Hank and Sarah's house. They replaced it with a nice looking Sumac. Anyways, I pulled up the old ground cover which had grown into a 4ft W x 2ft H x 3.5ft D bush. I was happy to get rid of that ugly thing. To the left of the weeping tree is a China Boy holly bush. Apparently you need a male variety so the females get pollinated and produce those great red berries. At least that is what the garden center guy told me so I would buy another plant.


Patio area east side (mid June 2009)
All I know about this area is that there are some ferns. The rest were suggested by Michael. I agreed because they were cheap and looked good. The tree (which I am surprised lasted due to the major root damage it received during the building of the wall) is a white flowering dogwood.


Patio area south east corner (mid June 2009) Goal = Japanese style garden area
Some ferns (Painted and regular Missouri ferns) and a Japanese Maple rescued from Sutherland's for $20


Patio - Lady of the Water / Herb garden (mid June 2009)
At this point in time we have 4 basil plants (2 sweet, purple, lemon); pineapple sage; spearmint; peppermint; thyme; Greek oregano; 3 chives (2 garlic, regular); curry plant (smells like curry); 3 rosemary


Patio - Lady of the Water (mid Sept. 2009)
By September we added: Large leaf basil; lime basil; lavender

9.20.2009

Landscaping Part 2 - Edging

All work done during mid to late June of 2009. Edging work began after the fence was finished. We ripped out all the old plants mainly aging ewes, hostas, azeleas, and ground cover. The groundcover is the same kind that was at my parents house and the same kind that I fought with every summer at my folks place. Yeah, that stuff was defiantely not staying! I told Luis #1 that I wanted the garden beds larger than original. He said no problem and told me to leave it to him. Moving the fence to expand the driveway produced a lot of extra soil which was handy in the prep of the garden beds.


I went to a local garden center (Suburban Lawn and Garden) and picked out the following plants. They were all on sale and as far as I know have no defects. I chose plants based on size, sunlight, interest, and cost. The overall deciding factor was always cost so I picked young plants. See 'Landscaping Part 3 - Plants' for plant selection.


East side front of house

BEFORE: Marked and with all the old plants which would be ripped out


AFTER: Edged and with new or repurposed plants. Luis kicked the edge out and made a great rounded shape.


AFTER: This is about 3 weeks later, we decided to have the brown shingles painted white. I hated those old brown shingles. The house has been fully painted white. This part was in progress at the time of the picture.


West side front of house.

BEFORE: Marked area to edge.


BEFORE: Closer view. See the difference in size of the beds.


AFTER: Finished job


Landscaping Part 1 - Fence

Since moving into the house we have done some major renovations and basically transformed this house. Since Holly took care of designing on the inside and there was nothing else left to do, I was delegated the outside. I am pretty sure I will get the basement as well. Anyways here is the front of the house before new landscaping. This is an old pic from the spring. I planted those daffodils the prior fall.


I subcontracted the work out to "Dos Luis'" as Holly and I referred to them as both the guys were named Luis. Anyways, they did a great job working in the evenings and on weekends. We
tore down the old fence which was destroyed by a tree (during December 2008) and built a new fence.

Yes...those X-mas lights do appear to be holding up a portion of the fence. We got those lights from Holly's parents and they are at least 30 years old. They don't make them like they used
to.


New fence is below. I ordered all the materials expecting a standard dog ear fence to be put up, but when we got back from Alaska, Dos Luis' had created the awesome fence we have now. Definitely not in the plans and way pricer when I received fence quotes from fencing companies. No problem for Dos Luis'. The old retaining wall was some old railroad ties which were hollow and rotted. The retaining wall built was above expectations as well. We bought some blue sandstone from Suburban Lawn and Garden.

Looking from the right front then left front


I love the look of this rock. The price was right too. We picked it up for a little more than what it would have cost for retail concrete wallstone. We were able to get a substantial discount using the discount from Rock Chalk Lawn Care. I would not have purchased the stone without a discount.


Luis # 1 working on some edging work which was a change order added after I saw the great work they did with the fence.


Luis #2 working with the rock we picked. I ordered three pallets of wall stone (larger flat pieces) and one pallet of edging stone. I think we only used 2 pallets of wallstone for the fence and I basically had a full pallet remaining. I didn't want to run out! Something needed to be done with all that wallstone.


8.06.2009

Bacon Explosion

The popularity of the www.bbqaddicts.com blog made this creation possible. It is the atom bomb of the culinary world. Something so flavorful, so extreme, and so innovative that it may potentially kill tens if not hundreds or even thousands of people by giving them heart attacks on the spot.

I met the guys who invented this delicous pork recipe while volunteering at the Great American BBQ (www.thinkbbq.com). It is just two guys and their ladies. They are young guys around my age who are in pursuit of perfection. Truly nice people and I wish nothing but the best for them. A tip of the 'ol hat gentleman.

We made the Bacon Explosion or Baconator (as my friends called it) for the SuperBowl along with numerous sausages and wings all being immersed in wonderful Ozark Pecan smoke.

Me: "Wait for it...."


Me: "Ka-blamo!"
Your name here: Action - Your face melting


Your name here: "Holy smokes Joe! Is that a 6 x 5 extra thick bacon weave!?! "
Me: "DAMN RIGHT IT IS!!!!"


Me: "Hail BBQ God, Full of Taste, The Grill is with thee. Blessed art thou with spices and rubs, and blessed is the fruit woods, pecans, and hickorys of the Missouri Ozarks. Holy BBQ Pit, Mother of the Smoke Ring, pray for us eaters now, and at the hour of dinner."


Me: "Bear down Chicago Bears"


The finished product


Only one thing left to do - Eat and drink with friends. Sorry Ryan and Lauren, apparently I felt it necessary to protect the innocent...or maybe I had too much to drink by this time.

Thanks BBQ Addicts! Good luck with your new product!

P.S. This beer holder has a patent pending.


7.21.2009

Packing & Shipping

There are some things in life that people dislike doing. Packing an odd shaped object and shipping it is something my Dad takes a disturbing amount of pride in. When Holly and I got married my folks came down and brought down a picnic table and chairs. The only item missing was the umbrella that went with the table. A challenge was born.

Now you must understand my Dad ships more items than an Internet retailer. I regularly receive packages from my Dad. Especially at work as there is always someone to receive the package. These packages range in size and shape from a simple envelope containing a magazine and letter to a large 3'x3'x3' box containing a 5 disc DVD/CD changer with surround sound speaker system packed so tight with foam peanuts, wrapping paper, and plastic air filled cells I had to disassemble it with a reciprocating saw. The people int he mail room at work love receiving packages form my Dad. It is always a fun challenge to determine what my Dad could possibly be sending now.

I knew that the mail room was in for a surprise when my Dad called me and told me he was going to send the umbrella, but stilled needed to work on how he was going to get it down to KC. Once the packaging material was established he went to work. When it arrived in the mail room at work it looked like this:

The umbrella was packed in two concrete tube forms. To keep the umbrella from sliding out the ends, my Dad decided that nothing else would work except for custom made wood covers screwed into the ends of the tubes. To hold the tubes together another custom option was needed. He inserted two wood trapezoids where the tubes connected together in the middle and screwed four 2" wood screws into the customer wood trapezoids. I have to say that the umbrella was received without any problems, however, the mail room people are convinced that I received a large sex toy. Thanks Dad.

7.19.2009

BBQ Season happening

BBQ. What does it mean to you? When I first moved to Missouri, BBQ, to this Chicago kid, meant chicken breasts grilled on a propane grill slathered in a sticky, sweet red sauce. My understanding of BBQ has become altered through my culinary adventures since moving to Kansas City. BBQ meccas = KC, Texas, Memphis, the Carolinas.

Barbequing is cooking a piece of subpar meat using wood powered heat and smoke at a low temp over a long period of time turning the once tough meat tender, juicy and creating "flavorplosions" (yep, I cam up with that) in your mouth. Cooking is done by heating a barbeque cooker (smoker) to 200 to 250 using wood or charcoal which infuses the meat with a smokey flavor that brings out the cave person in all of us. It is a long process, taking anywhere from 4 hours to roughly 22 hours, with a median time of 18 hours. The longest I have cooked something was 18 hours. Cooking "low and slow" breaks down the connective tissue in the meat and melts the fat causing the bbq'ed item to fall apart. BBQ food examples are brisket, pork butt (shoulder), turkey, chicken, sausages, ribs, whole fish and potatoes.

Grilling is cooking food over direct or indirect heat source using charcoal, wood, or anything else flammable on grill. Grilling is quick, convenient, and delicious. Steaks, fish fillets, whole chicken, shrimp, clams, mussels, veggies, fruit, pork chops/tenderloins, and marshmallows.


I like both methods for flavor, but I really enjoy BBQ. What other food is an event and what other food generates such positive reactions.

My smoker is a barrel smoker.
The large part of the smoker is where the meat is placed. The small part on the right is the firebox where wood is combusted. Regional BBQ and wood go hand in hand. Wood used for bbq is based on availability.

Since KC is by the Ozarks, I use Ozark pecan wood from southern MO vendors and apple wood (from Mark W.'s backyard). The wood burning in the firebox is the pecan wood.

When the smoker is in action, I control the heat by controlling the amount of air allowed into the smoker. This is done in two locations. The primary location is an adjustable air vent on the right side of the firebox or by opening or closing the flap on the top of the smoke stack on the left of the smoker. Basically, the heat and smoke flows from left to right going out the top of the smoke stack. This bathes the meat in smoky goodness. The process is long, but yields excellent results. See below.


The pics below are of a brisket which I cooked for 18 hours
The brisket is in a tin after being cooked on the grate for the first half of the process.
The brisket should be covered during the final cooking process as it keeps the brisket moist.
I use a rub whenever I BBQ. A rub is a strong spice blend made of paprika, salt, pepper, cayenne pepper, sugar and some extra spices (garlic powder, onion powder, chile powder, cumin, or anything else that sounds good)


Looks like I added some red pepper flakes to this one.


This is the pork butt I made for our float trip. Once the pork is pulled off it is important to pull it when it it hot just because it makes the process easier.
The shoulder/butt develops a nice black crust near the end of the cooking process due to the sugar in the rub used. That outside is nothing but pure flavor. Yum.

This is what the pork looks like when it is pulled. I pull the pork with two large serving forks. This just fell apart. The key is to cook the shoulder to 180 degrees. This melts the collagen and fat making the pork tender and moist. Doesn't get much better than this.